When using Linux, knowing how to create a partition is essential. The goal is to split your disk partitions to create other sections separate from the initial partition. Partitioning gives you room to define what to contain in a section. Whether you want to partition your hard drive or an external device such as a USB, this post shares insights on how to do so. Moreover, we will give a practical example of what the process is like and what commands to use.
How to Create a Partition in Linux
Creating partitions is one way of structuring your storage devices in Linux. Instead of having a large storage space, you can opt to have different smaller portions acting independently.
There are different instances when you will need to partition your drives. For example, when you want to install other operating systems, each must be on its partition, and if you only have one partition, partitioning is required.
In Linux, there are several ways that you can follow to create a partition. However, this post focuses on the fdisk command, which is easy and more convenient for most cases. Using fdisk, you can create a partition with the below steps.
Step 1: View the Existing Partitions
Before proceeding with creating a partition, you must first know what partitions exist on your operating system. Using the fdisk command, add the -l flag to list all the available partitions and their information.
Here’s what we have for our case.
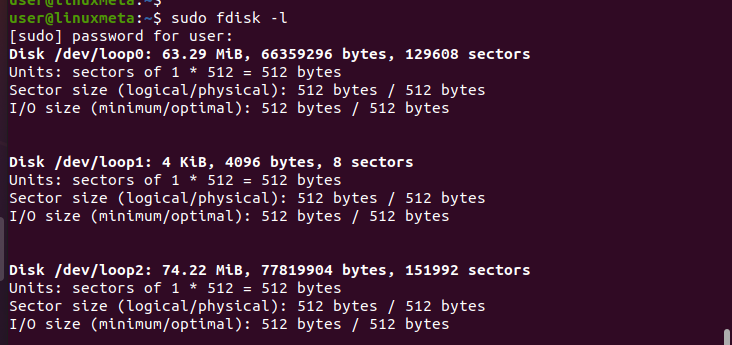
Go through the output and check which partition you wish to split. In most cases, you will go for the biggest partition. However, we will work with the /dev/loop2 for this example. Note the size of the disk.
Step 2: Choose the Disk to Partition
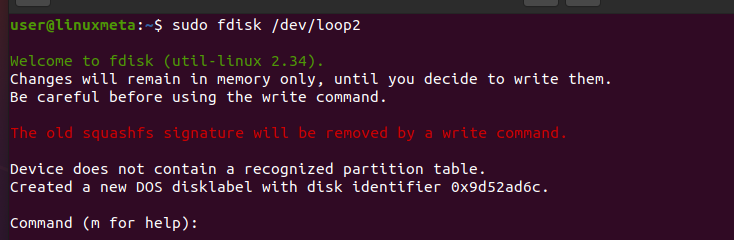
The new partition we want to create must be extracted from an existing storage disk. Once you’ve decided which disk to use, run the command below.
Once you run the command, fdisk will open in its command mode, allowing you to edit the selected disk. You will get an output showing that the changes will remain temporary until you persist them by writing them to disk.
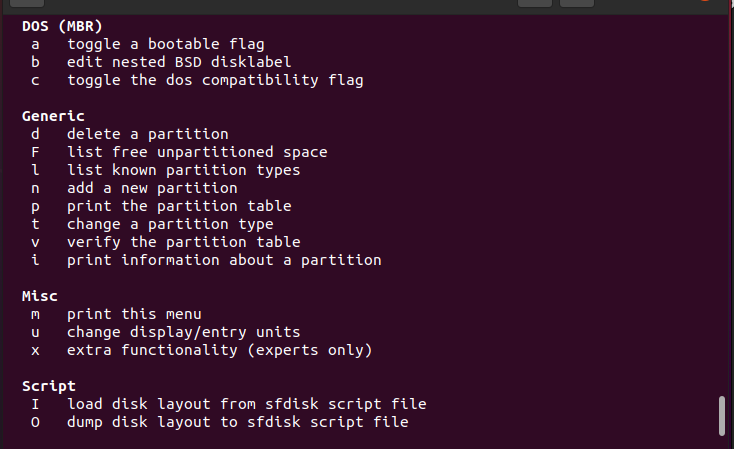
The fdisk utility offers numerous straightforward commands for working on your partitions. To get help on these commands and their descriptions, press ‘m’ and hit the enter key. You will get an output like the one below.
Go through the commands to see which ones you will likely use to create the partition, then proceed to the next step.
Step 3: Creating a Linux Partition
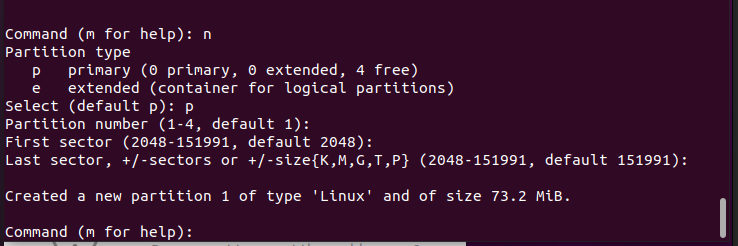
From the command mode help page, we noticed that to create a partition, we must type ‘n’ and press the enter key. Once you do so, you will be prompted to answer a few prompts.
Let’s use the default option for the partition type by pressing ‘p.’ For the partition number, first, and last sector, use the default options by pressing the enter key.
The new partition will start at the available sector and increase to the maximum available sector. However, you can specify different metrics depending on your goal for creating the partition.
Once you’ve made your selection, you will get an output showing that your partition of type ‘Linux’ has been created, and the size will also be displayed.
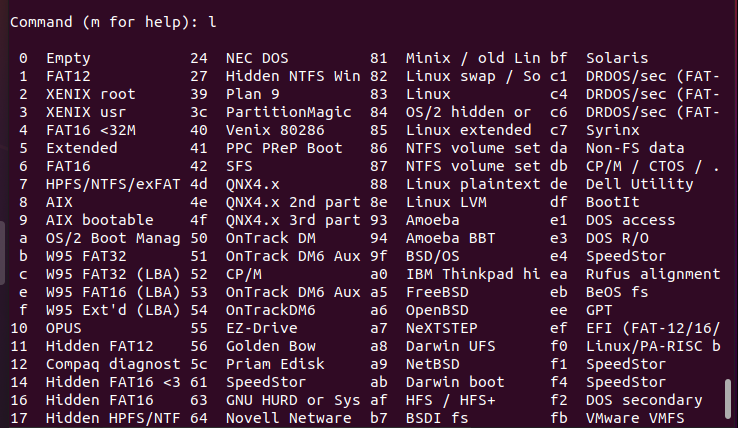
By default, a partition of type ‘Linux’ gets created. However, there are tons of partition types that you can use, and you only need to specify which to use. To get a comprehensive list of all the available types, type ‘l’ and press the enter key.

From the output you get, find which type you want to use and note its hex code. To change the partition type, press ‘t,’ and once your newly created partition is selected, type the hex code. You will get an output showing that the partition has been changed from ‘old_type’ to ‘new_type.’ For demonstration, we’ve kept our partition type the same.
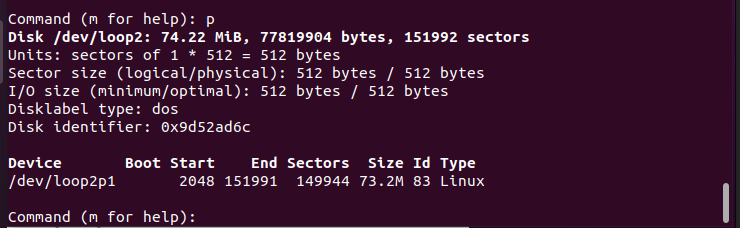
Now that you’ve created the partition, the remaining step is to write the changes to the disk. First, let’s view a summary of all the changes that we’ve made. To do so, type ‘p,’ and you will get all the changes stored in memory.
Confirm that everything is per your preference.

Once everything is set, write to disk by typing ‘w.’
Step 5: Format the Partition
The last step involves formatting the new partition. Again, you can use different formatting options, but in our case, we are using ext4 as our type.
Run your command as follows.
If you get any prompt like the one below, confirm that you want to proceed, and the formatting will proceed.
Conclusion
In Linux, creating a partition from a disk is easy and an excellent way of having different smaller versions of a bigger disk. This post shares all the steps and commands you need to create a partition in Linux. This step-by-step guide has cleared any doubts you have and guided you in the right direction.