How many Ubuntu file archive tools do you know? Today’s post will add one more tool to your arsenal. 7Zip is an open-source file archiver that stands out thanks to its high compression ratio.
File compression is handy for any user; compressing helps save disk space when you have large files. Moreover, compressing saves bandwidth when sending such files. Considering all these benefits of file compression, it becomes essential for anyone to know how to install a file compression tool such as 7zip. Luckily, we’ve covered all the steps for installing 7zip on Ubuntu 22.04. Read on!
Three Ways of Installing 7zip on Ubuntu 22.04
When installing 7zip, there are three versions that you can use. First, you can use 7zip as a command line utility. Its GUI version is p7zip-desktop. Moreover, you can use a previous 7zip command line version called p7zip. We’ve installed the three options using the methods below.
Method 1: Installing 7zip via APT
To get the command line 7zip package on Ubuntu 22.04, you can use APT to fetch it from your default repository and install it on your system.
The first task is to update your system’s package index using the command below.

7zip is a small package, and the installation will occur fast, depending on your network’s speed.

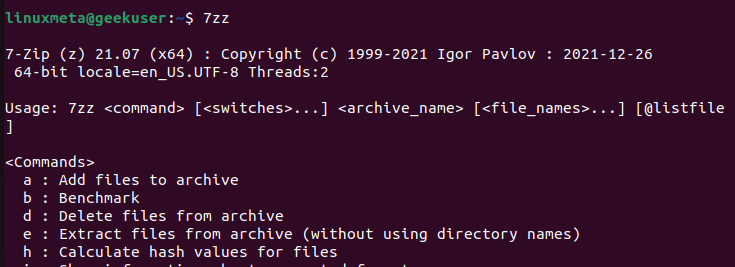
Once 7zip completes installing, you can start using it for file compression. To verify that we’ve installed it successfully, let’s run the command below.
You will get an output showing the installed version. Below it, you will see the different commands you can use alongside their descriptions.
Method 2: Install the 7zip Desktop Version
We understand that not everyone wishes to use the terminal. Luckily, there is a GUI version of the 7zip utility. Unlike the terminal version, installing the 7zip desktop requires installing the p7zip-desktop tool by sourcing it from the snap store.
Use the command below.

As as snap package, installing p7zip-desktop will also install any prerequisite packages that it may require.
You will get an output showing the progress of the download. Once it downloads, it will automatically fetch the dependencies and install the archive tools.
On your Ubuntu 22.04, click on the search to locate the p7zip-desktop from your installed applications. If it appears in the search results, this confirms that you’ve successfully installed the 7zip GUI version. Feel free to open it, interact with it, and see what it offers.

Method 3: Install p7zip-full
As mentioned earlier, 7zip is the newer version of the file archive, and its older version is p7zip. However, even this old version still works as expected to help you handle your files.
To install this 7zip version, we will use APT with the following command.
When a prompt requiring you to confirm the installation appears, type ‘y’ to proceed and let the process run to completion.
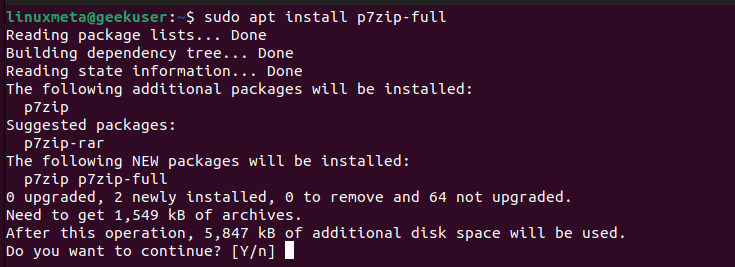
Once it installs, you can open the utility from your command line. Similar to what we did with 7zip, we will also run an almost similar command on the terminal. The output will show the installed version, the different commands you can use with it, and their descriptions.

That’s how to install 7zip on Ubuntu 22.04.
Conclusion
7zip is a reliable file archive tool. Its high compression ratio makes it worth using. However, the tool doesn’t come installed on Ubuntu 22.04. To install it, you can use three options. You can install its desktop version or the command line utility. Alternatively, you can install its older version, which works the same way. All three methods are detailed in this post. Please refer to it.

