If you’ve used Microsoft Remote Desktop Protocol (RDP) to connect to a remote computer/server, you will be thrilled to know that you can achieve the same on Ubuntu 20.04. For Ubuntu, we don’t use RDP. Instead, we use Virtual Network Computing (VNC). It is an open-source desktop-sharing system that makes it easy for users to connect to their remote servers and interact with their graphical desktops using a mouse and keyboard. Throughout this post, we will focus on the steps to follow to quickly and correctly install and configure VNC on Ubuntu 20.04. Read on!
Step By Step Guide on How to Install and Configure VNC on Ubuntu 20.04
VNC offers different options on which VNC client you can use. However, this post will utilize the TightVNC client as it supports connections over SSH tunnels while offering better performance and reliability. Setting up an SSH tunnel lets you securely connect to the remote server over VNC, as VNC itself can be sniffed, creating a security threat.
Let’s go through the steps to install and then configure VNC on Ubuntu 20.04.
Step 1: Install Required Packages
There are various packages needed to support installing VNC. We’ve already mentioned that we need a VNC client, and we will install TightVNC for this guide. Since Ubuntu servers are terminal-based, we must install a desktop environment that we will access when we connect using VNC. We’ve installed the Xfce desktop environment as it is lightweight and stable, even when using it on a server.
To install the two, run the install command below.
While it’s possible to install TightVNC and Xfce separately, we’ve reduced the workload by running a single command.
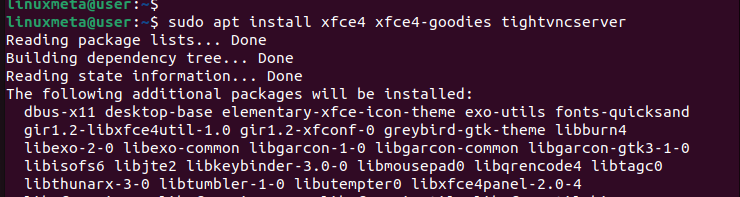
Ensure the process runs without interference. You will get an output showing that the Xfce setup is completed, and TightVNC will have also been installed.

Step 2: Setup a VNC Access Password
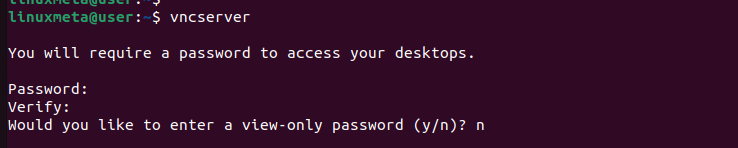
Now that you’ve installed VNC. The next step involves a quick user configuration to set up an access password for the VNC instance you have. For that, run the vncserver command.
Enter your password and confirm it. For the view-only password, press ‘n’ to avoid creating it. The view-only password is only helpful in an instance where you are demonstrating the created VNC instance, but you can’t use your keyboard or mouse in this mode.
Running the vncserver command also creates default configuration files. For instance, it creates a server instance running on port 5901. In the example below, our display port is referenced as

After you’ve set up your access password, you have room to change it anytime, including setting a view-only password. Running the vncpasswd will give you this access.

Step 3: Configuring TightVNC
Although we’ve installed Xfce as our graphical desktop environment, our VNC server can’t know if it should use it unless we specify so. VNC relies on the xstartup configuration file to know what tasks it should perform at start-up. Therefore, we must access this configuration file and edit it.
First, let’s kill the running VNC server instance with the command below.
Ensure you replace your display port in the command accordingly.

Next, open the xstartup with a text editor.
Add the below lines specifying that it should read the Xresources file and launch Xfce as the graphical desktop environment.

Save and exit the configuration file. We also need to make the xstartup configuration file executable. Use the chmod command for that.

Step 4: Restart VNC
After editing the VNC server configuration file, restarting it will ensure our changes take effect. When restarting VNC, it’s recommended to bind it with our server’s loopback interface, which is localhost. Doing so ensures that VNC will only connect with traffic from our server.
Run the below command to restart the VNC server and bind it to localhost.

Step 5: Configuring VNC As a System Service
At this point, we are ready to connect to our remote server using the VNC server. However, starting and stopping the VNC server manually can be automated by creating a systemd unit file for our VNC.
Create the configuration file below and replace the “User” accordingly. We’ve named our configuration file “[email protected],” and it is located at /etc/systemd/system/.
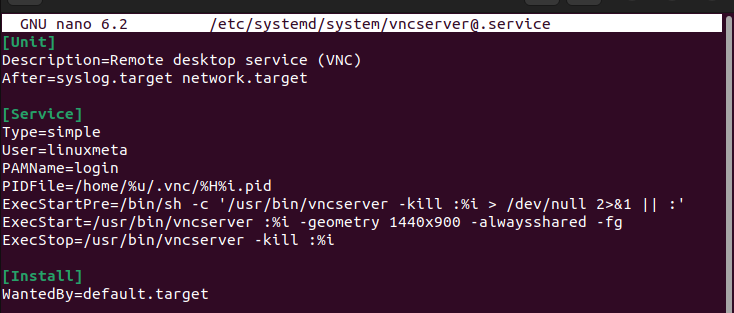
Once you created the file, save it. You then must restart the systemctl with the below command.

Set the unit file to load at boot time by enabling it.
The @2 for this case indicates the display port through which our VNC server will run. Ensure you use the correct display port for your case based on the previous steps we’ve covered.

You can now start your VNC service.
Step 6: Connecting to the VNC Server
The last step is to create an SSH tunnel through which we will connect to our server. On Linux, use the below command for the SSH tunnel and add your username and the correct server IP.
Once you enter your password, you will access the default Xfce desktop that we installed earlier.
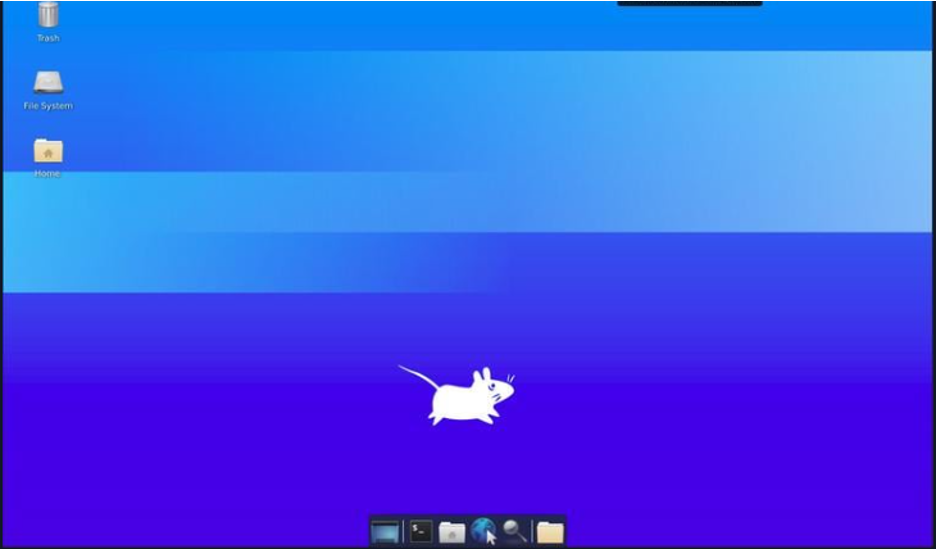
This example has focused on how to connect to the VNC server using Ubuntu via SSH. However, you can connect to the server via Putty or other remote client tools, depending on your operating system.
Conclusion
VNC gives users an easy way of connecting to a remote server and interacting with it using a graphical desktop environment. Everything regarding what steps and commands to use to install and configure VNC on Ubuntu 20.04 has been detailed in this post. Go through each step, implementing the same on your end until you understand the entire process. That’s it!