MySQL is a commonly used relational database, and its simple and scalable nature makes it a favorite choice for many users. MySQL is applicable to small systems and even enterprise-level database needs. As such, knowing how to install it on Ubuntu is helpful. This post focuses on the steps to install MySQL on Ubuntu 20.04. Hopefully, this step-by-step guide will clear the air on how to install and become comfortable using MySQL. Let’s begin!
A Detailed Guide to Install MySQL on Ubuntu 20.04
Installing MySQL has minimal requirements. Ensure you have a user account with sudo privileges and access to an internet connection. Once everything is ready, follow the steps below.
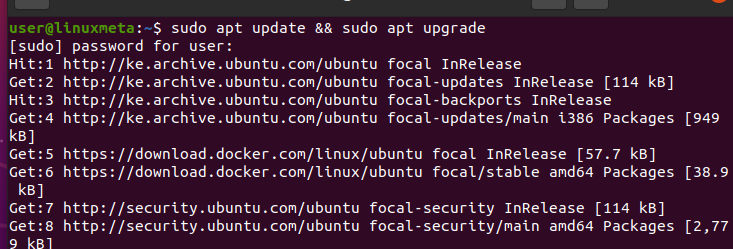
Step 1: Update Your System’s Repository
Ubuntu relies on the sources list to fetch packages from its official repository. Therefore, before installing MySQL, we should update the repository to get the latest version.
Update and upgrade your package repository using the command below.
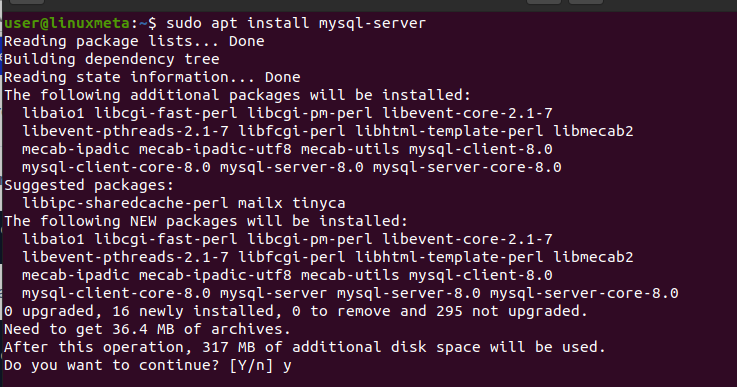
Step 2: Install MySQL
After updating the repository, we can install the MySQL server using the command below.
You will be prompted to confirm the installation. Press ‘y’ and the enter key.
Step 3: Start the MySQL Server
Although we’ve installed the MySQL server package, we still must start its service before we can proceed with configuring it. Use the systemctl command to start it.

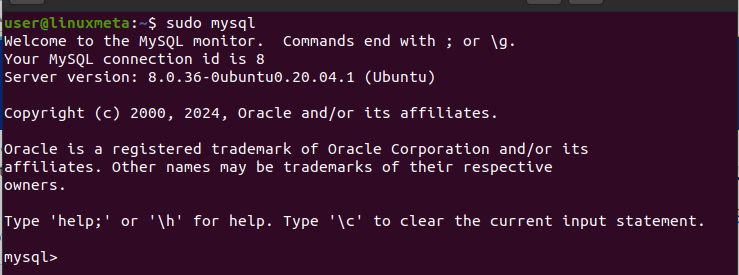
Step 4: Configure MySQL
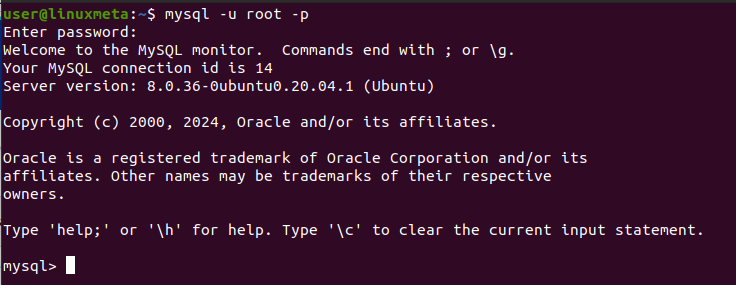
There are a few configuration tasks we must perform before running the MySQL setup script. Start by accessing the MySQL command prompt.
Once it opens, you will get an output like the one below.
Next, let’s use the ALTER option to set a password for the root user. Replace the command below with the password you wish to use for your root.
The ‘Query OK’ confirms that the root password has been successfully set.

You can then exit the MySQL command prompt by running the ‘exit’ command.

Step 5: Run the MySQL Setup Script
MySQL offers the mysql_secure_installation script to handle various actions as part of ensuring your database is secured as you create it. As such, it’s important that you run the script before utilizing MySQL for your data storage.
Run the script using the below command.
Enter the root password we created in step 4 to authenticate the root user.

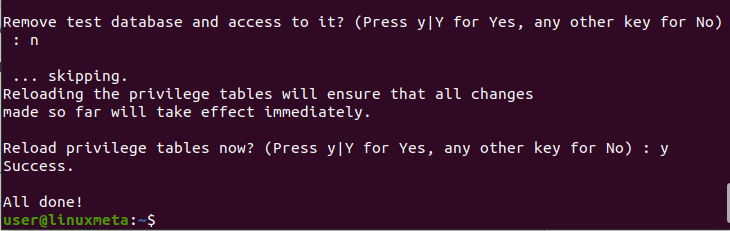
A series of prompts will appear to ensure security is enhanced during the installation. Go through each prompt and select your preferred setup option. For instance, you will be prompted to validate the password plugin, remove anonymous users, remove the test database, etc.
Once you’ve responded to all the prompts, the privilege table will reload to capture all the changes, and you will have completed running the script.
Step 6: Change the Authentication Method
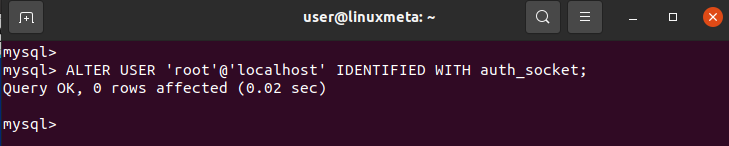
It is recommended that the authentication method be changed after running the script in the previous step. First, authenticate the root user to access the MySQL prompt.
For this case, we want to set our authentication plugin to auth_socket. Although there are other options, using the auth_socket offers a more straightforward yet effective way of securing the database.
Change it with the below command.
Step 7: Add Users and Set Privilege
We already have the root user, but for security purposes, you should create another user and restrict the privileges they will have when accessing the database.
We’ve created a user and set the access password. Replace the username and password in the below command to work for your case.

With our user created, the next task is to define what privileges the user should have when accessing the MySQL database. For that, we will use the GRANT keyword to specify the privileges. For instance, we have granted our user a few privileges on all databases using the below command.
Feel free to select any privilege that is ideal for your case.

Lastly, flush the privileges to save them and exit.

Step 8: Verify the Created User
Confirm that the created user can access the database but has limitations based on the set privileges. First, start by checking the MySQL service to ensure it is active and running.

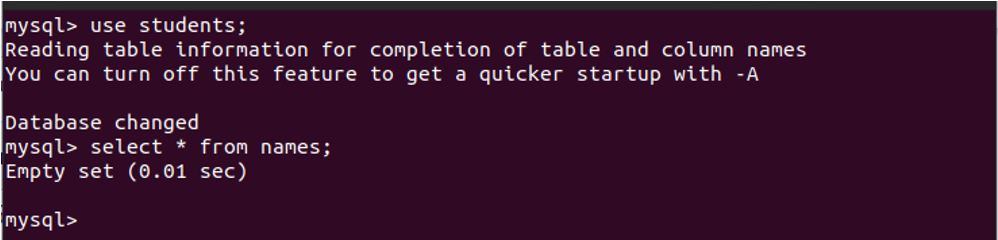
Next, access the database using the created user and the set credentials.

Once the MySQL prompts appear, you’ve verified that the user can access the database. Try performing some database operations to confirm that the set privileges work.
For our case, the user can SELECT from a table.
However, the user can’t run the DROP command.

Conclusion
Installing MySQL on Ubuntu 20.04 is a simple process. The only trick is knowing which commands to follow. Luckily, this post shares a step-by-step guide on everything regarding installing MySQL on Ubuntu 20.04.